
What is Backpotting? When do I use Backpotting?
 Written by
Wendy Jane
Preston
Written by
Wendy Jane
Preston
Definition of Backpotting and Potting
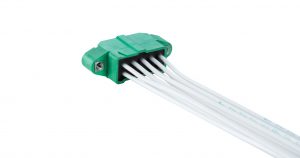
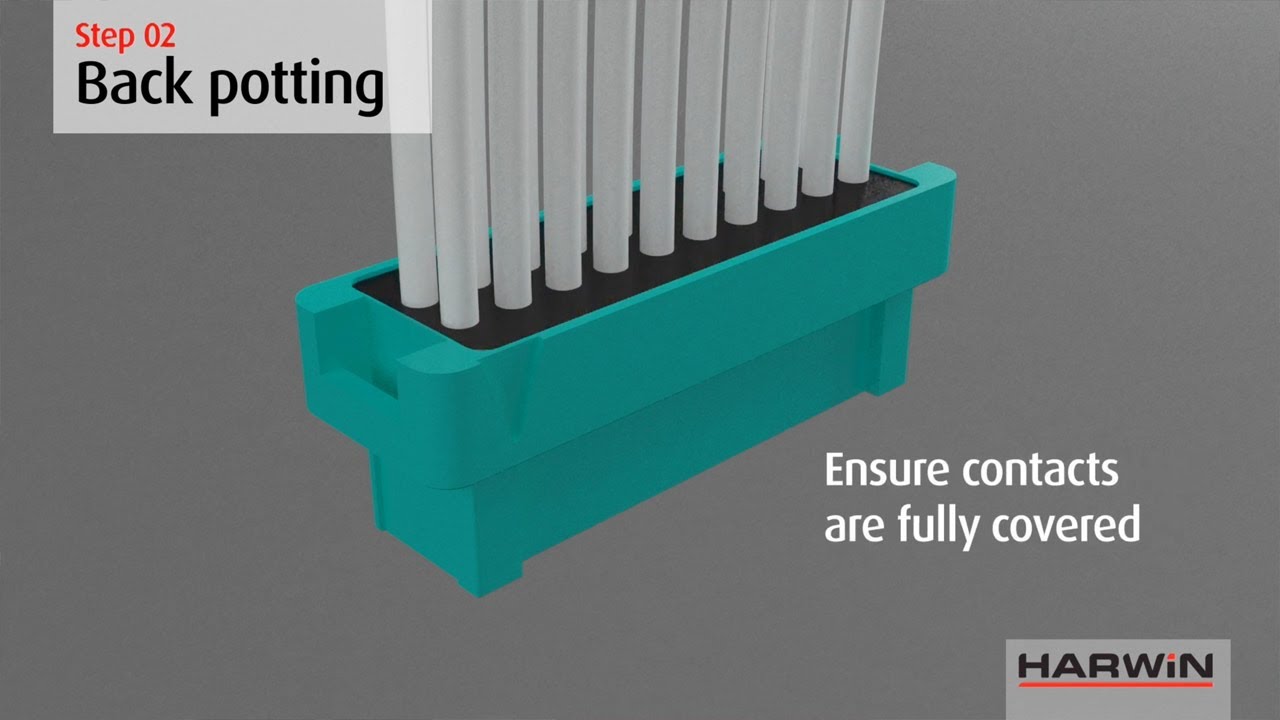
Backpotting (or back-potting) is widely used in the connector industry to refer to the use of a potting compound on the rear of a connector (normally a cable connector). Potting is the filling of an area using an epoxy resin or similar liquid compound, which then hardens to a solid in-fill or barrier.
Download this article in PDF format
Why use Backpotting on a Cable Connector?
There are several advantages to backpotting a cable connector.
- Gives additional strain relief to the cables and contacts. Contacts will have a certain holding force keeping the contacts in the housing once assembled, but it is limited. By adding backpotting, the holding force of every contact is greatly improved.
- Lightweight strain relief. Backshells, hoods, and overmoulding can also provide additional strain relief, but are also bulkier and heavier than a small amount of backpotting compound.
- Sealing the rear of the connector from moisture and dust. The solid resin provides a surface-to-surface coverage, and fills in any spaces around the rear of the contact which would otherwise be open.

Strain relief on the rear of a cable connector can help prevent removal of contacts by pulling on the wires. It can also help with reducing side-load on the contacts, when the wires are routed at a tight angle immediately behind the connector body. The backpotting thereby adds strength to the whole assembly, and increases reliability, reducing the possibility of failures in this area.
When can I use Backpotting on a Cable Connector?
Backpotting can be used on many different cable connectors, once the cable assembly has been completed. However, it is easier to backpot when there is a specific area with a retaining wall that will contain the liquid whilst it sets. Consider these points:
- Is there a retaining wall on the rear of the connector? It may also be called an extended wall, a backpotting wall, or similar. If so, no extra tooling is required to retain the compound whilst it is liquid.
- If there is no retaining wall, are you fitting any sort of hood or backshell? It might be possible to fit the hood, and then completely fill up the inside of the completed hood assembly with the compound. This will depend on the design of the hood, whether it has any holes or is a close fit to the connector, and if the potting might interfere with jackscrews.
- If there is no wall, and you are not using a hood, then you will need to create a temporary wall around the rear of the connector to retain the compound whilst it is setting. This can be achieved with something as simple as masking tape. Once the compound has solidified, the temporary wall can be removed and the resulting backpotting is strong enough to not require further support.
- Are you not wiring up all the contacts? If so, you will still need to populate all the contacts, or use a dummy contact when you are not populating a contact. Otherwise the liquid compound will flow out through the empty hole in the housing!
- Consider the actual design of the crimp contacts – some contacts have a very open design that has no means of keeping the liquid compound at the rear of the contact. These designs are more common with open crimps on basic PCB connectors, and are not suitable for backpotting.
- Whilst you are applying the backpotting and it is setting, keep the connector mated to another connector. This will make sure that all the contacts are properly aligned and straight in the housing when they are permanently fixed and can no longer move. A lot of cable contacts have a certain amount of float whilst assembled, and there is a risk of the contact getting permanently fixed at an angle – increasing wear in a particular spot and increasing insertion force, potentially leading to early failure.
What Backpotting materials are there?
There are many options available on the market, depending on what specifications you require. You will need to consult the manufacturer’s datasheets for full technical information on their compounds. For use with Harwin connectors, we have tested the following:
- Stycast 2651MM with Catalyst 9 (available from Ellsworth or Silmid)
- Stycast 2651 with Catalyst 11 (this gives off some fumes during use and setting, you may need a fume cupboard – available from Ellsworth)
- Robnor Resins PX439XS/BK (available from Farnell)
- Epoxies Innovative Bonding Solutions 50-3122RBK (available from Epoxies)
How do I do Backpotting?
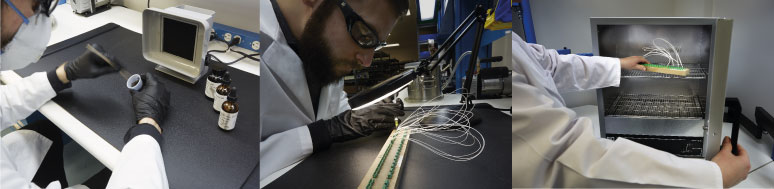
Using epoxy resins is like dealing with glue – have a clean working area, try not to get it on things you don’t want it on! Most epoxy resins are a two-part compound or a resin and a hardener, which stays liquid before mixing. Each compound will have its own detailed instructions on mixing, application and drying times, but here’s a basic step-by-step process:
- Create a potting wall if required.
- Use a fixture to hold the connector steady. The simplest fixture is to glue a mating connector to a rigid board, and mate the connector being potted. Alternatively hold the connector in a small vice, or a machined pocket in a suitable material – we recommend the connector is still mated in these methods.
- Mix the epoxy compounds (resin and hardener) to manufacturer’s specification – not too vigorously to minimise air bubbles.
- Load the mixed epoxy into a syringe or dispensing system, with the appropriate nozzle size for the application. If you need to use a small applicator nozzle, the compound will require more force to push out through the nozzle – in these cases, a powered dispensing system should be considered.
- Dispense the required amount to fill the area.
- If required, use a vacuum environment to de-gas the dispensed fluid – this process removes trapped air bubbles.
- Place the assembly somewhere safe whilst the epoxy compound cures (sets). For some resins, heat may be required or can be used to speed up the curing time.
- Once the assembly is set, remove any material used to create a temporary potting wall and inspect the completed product.
Download our “Step-by-Step Guide to Backpotting” now or watch the video below…
Can Harwin help with Backpotting?
We offer backpotting as part of our full Cable Assembly Service. The following connectors come with a backpotting wall and are suitable for being used with backpotting:
- Gecko-SL and Gecko with Latches (all cable connectors starting with G125);
- M300 Series cable connectors;
- Datamate Extended Wall connectors (part numbers M80-465/466/475/476/485/486 for female, M80-565/566/575/566 for male connectors).
We have produced a Product Training Module to guide you through the cable connector and assembly options that are available from Harwin.
How can we help you?
If you would like to talk to someone about Harwin’s product, technical knowledge or documentation, contact one of our Experts for assistance.
More articles for you

5 Considerations for Backpotting Cable Connectors
10 September 2019
Extended Wall Datamate – What is it?
10 February 2020
3 Reasons to use Ready-Made Cable Assemblies
06 November 2019Uh oh, it looks like you are using an outdated browser version.
Some functions may not work as expected on Harwin.com in your current browser. For the best experience, more security and speed, we recommend updating your browser to the latest version.
(if you are using Internet Explorer, we recommend switching to an alternative browser.)
Still having issue? Contact [email protected] for help.